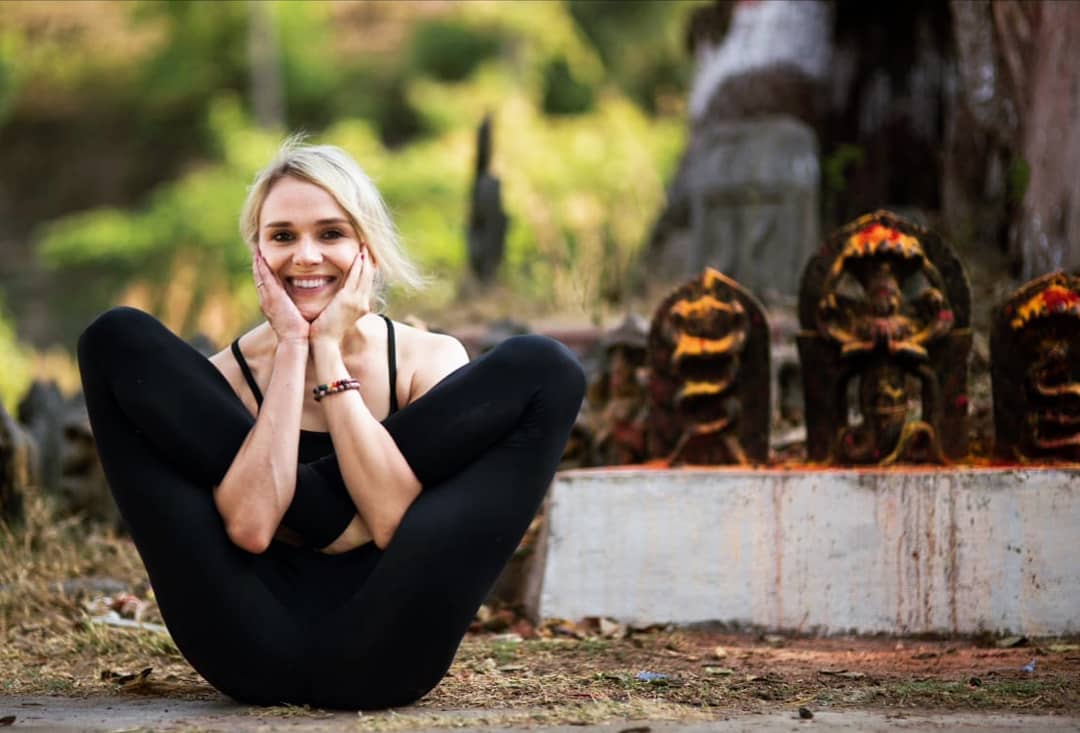
There are only 84 basic Yoga poses that you will practice frequently. However, Yoga is an ancient art and, in the thousands of years it has been practiced, many challenging and intricate poses have been created to push the practitioner’s body to the limit.
In this article, we will be discussing forty of the most difficult, complex, and invigorating poses in Yoga. If you want to challenge yourself during your Yoga practice, then adding any of these hard yoga poses is sure to do so.
40 Most Difficult Yoga Poses/Challenge Yoga Poses for You Try
1: Formidable Face Pose
We will start by discussing what is likely one of the most difficult poses on this list. Formidable Face requires incredible amounts of flexibility and core strength. However, if you can perform this pose correctly, you will be able to stretch nearly every muscle in your chest and develop your balance significantly. The steps involved in this pose include:
- Start in a plank position with hands and feet shoulder width apart.
- Lift your left leg into the air.
- Press your chest downwards. As you do so, lift your right leg up and tighten your core muscles to balance yourself.
2: Shoulder Pressing Pose
This pose does not require as much arm strength as you think it would. Even so, the Shoulder Pressing Pose will test both your physical and mental endurance as your shoulders carry the entire weight of your body. To do the Shoulder Pressing Pose, you need to:
- Start off by squatting as low as possible. Point your knees out to the side.
- Fold on to your torso, keeping it between your thighs. You want your weight to be leaning forward.
- Align the bottom of your hands with the bottom of your feet as you press both arms into your thighs.
- Squeeze all parts of your arms and shoulders into your thighs and begin to lift yourself off the ground. Hold this position for between five and ten breaths.
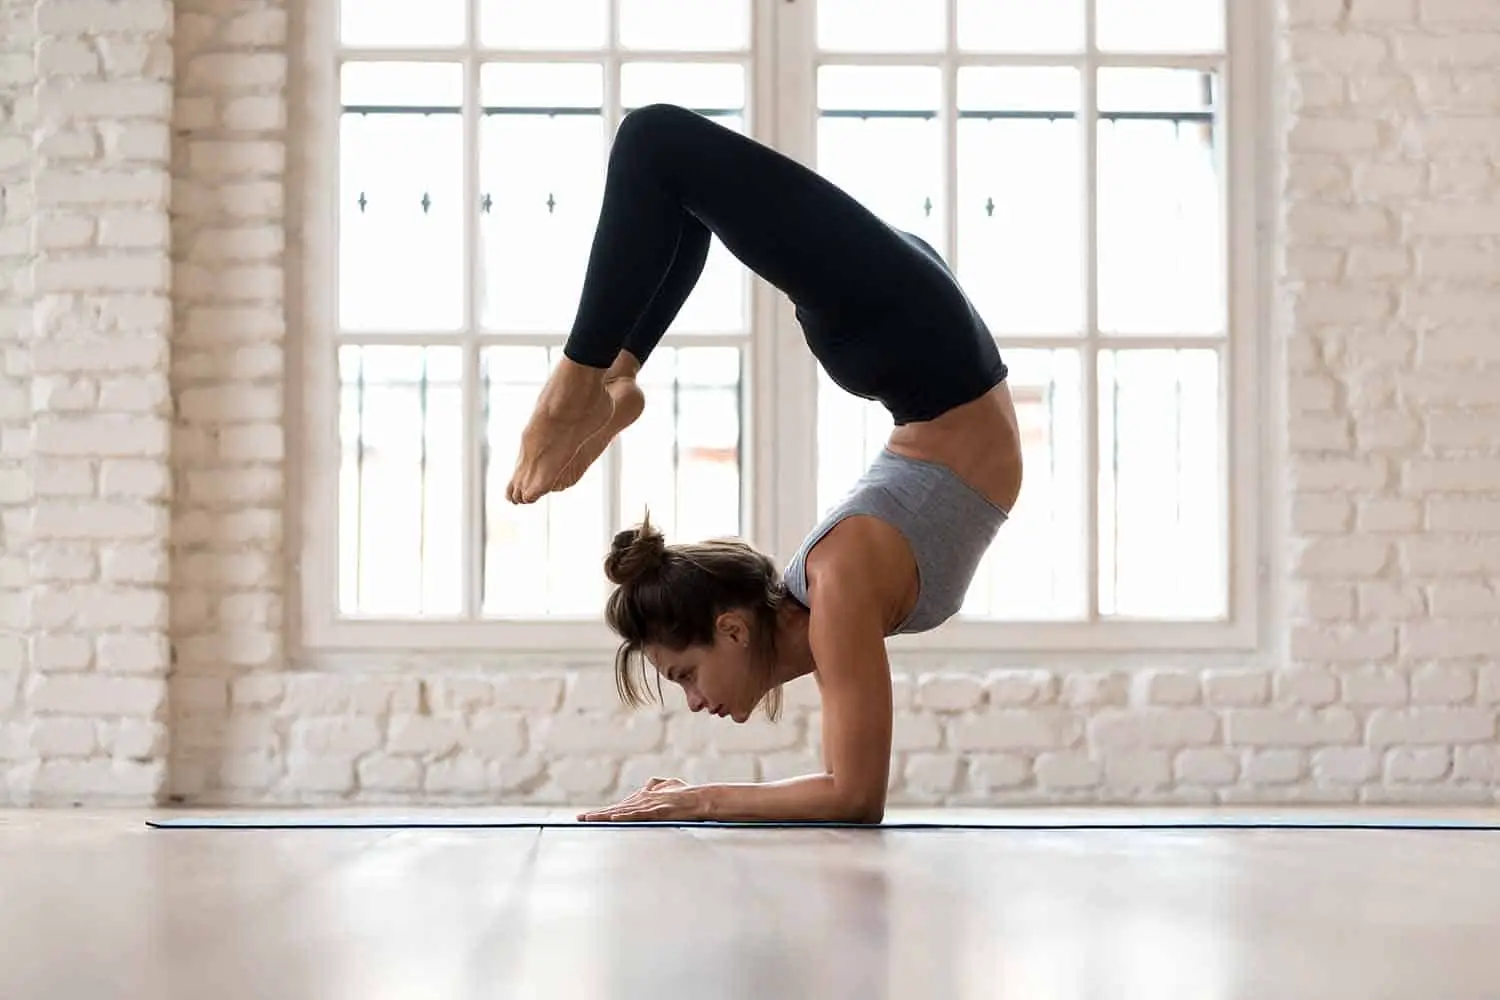
3: The Exorcist Pose
Named after the horror film this pose can be terrifying to new Yogis. The Exorcist pose requires a good deal of strength and flexibility. However, once you start working on this pose, you will notice that your hip flexibility will increase dramatically, making other poses a lot easier. There are several steps in this pose:
- Begin in the Compass Pose.
- From this position, press both of your hands into the mat.
- Extend your opposite out leg as far as you can.
4: Destroyer of the Universe Pose
The intimidating name fits this challenging pose. The Destroyer of the Universe pose shares many similarities with the Exorcist poses though it requires you to twist your leg in a unique way. When done well, this pose alone gives a full-body workout. To do this pose, you need to:
- Start in a side plank position.
- Bend your right knee and grab it with your left hand. Pull your right knee to just above your right elbow.
- Bend your hips forward slightly to allow you to push your right leg above your head. You can drive your chest outwards if you want your ankle to get above your head.
- Raise your left arm straight into the air and hold this position for at least three breaths.

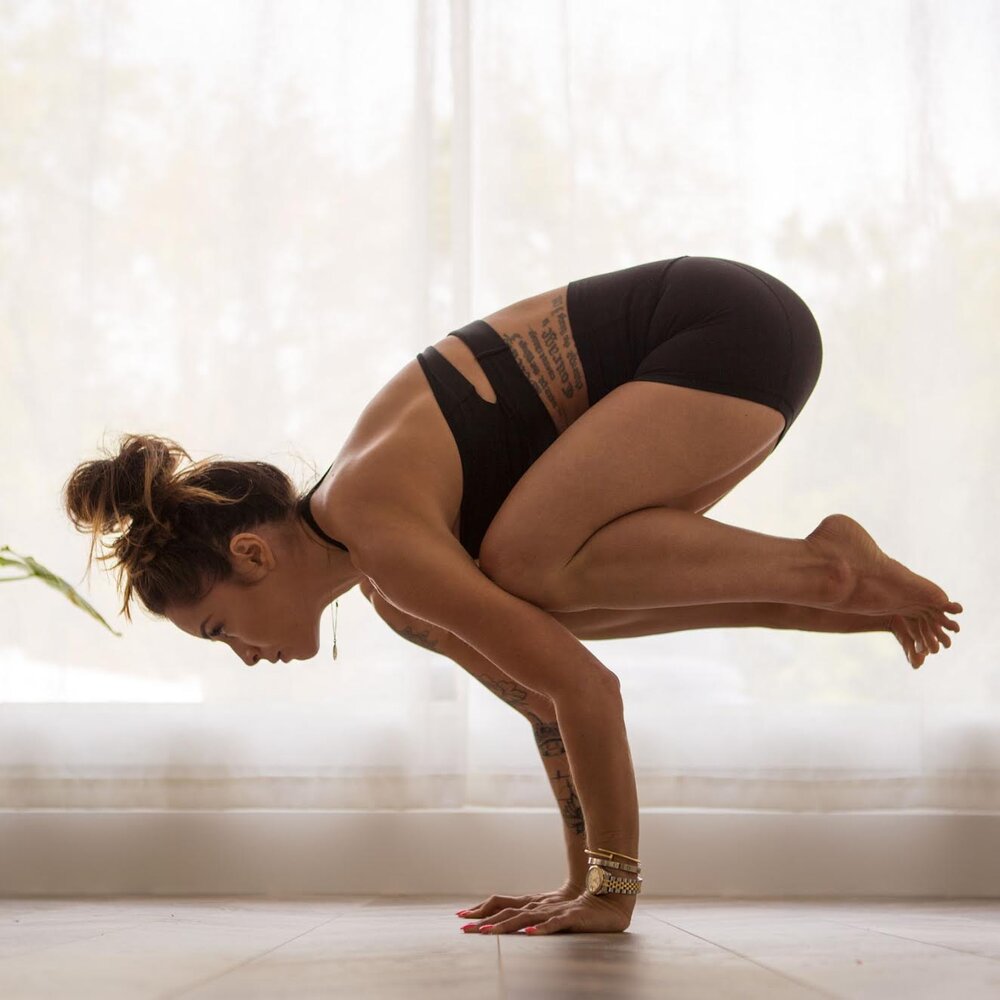
5: Crow Pose
The Crow Pose requires strong arms and good balance. If you can do this pose well, your wrists, core, forearms, and shoulders will benefit. To perform the Crow Pose, you need to:
- Start by performing a deep squat. Make sure to stay on the balls of your feet with your arms out in front of you.
- Push your hands into the ground in front of you, keeping them shoulder width apart. Make sure your shoulders do not cover your ears.
- Fold your body forward and transfer your weight to your fingertips. Lift your toes into the air and press your knees into your armpits.
- Hold this position for between five and ten breaths.
6: Side Plank Pose
While this pose is not complicated, the Side Plank requires nearly every part of your body to be balanced and strong. By holding your body off the ground with just one arm, you can develop strong arms and improve the muscles in your core. There are only a couple of steps in this pose:
- Start in a traditional plank pose, with hands and feet shoulder width apart.
- Touch your left heel with your right heel. Place the right foot on top of your left foot.
- Next, bring your legs together and roll over on to your side. Raise your right hand and engage your core to maintain balance.
- Hold this position for between 30 seconds and 1 minute.
7: Yogi Staff Pose
While challenging, the Yogi Staff pose is one of the most mentally relaxing poses you can perform. When you perform this pose well, you should feel a sense of relief and relaxation as your body gets an incredible stretch. The steps in the Yogi Staff Pose are:
- Start in a seated position, with your knees wider than your shoulders.
- Lower your right knee into the ground as you push your right foot into your right armpit.
- Lean into your right leg and look left. Hold this position and breath in for up to five breaths.

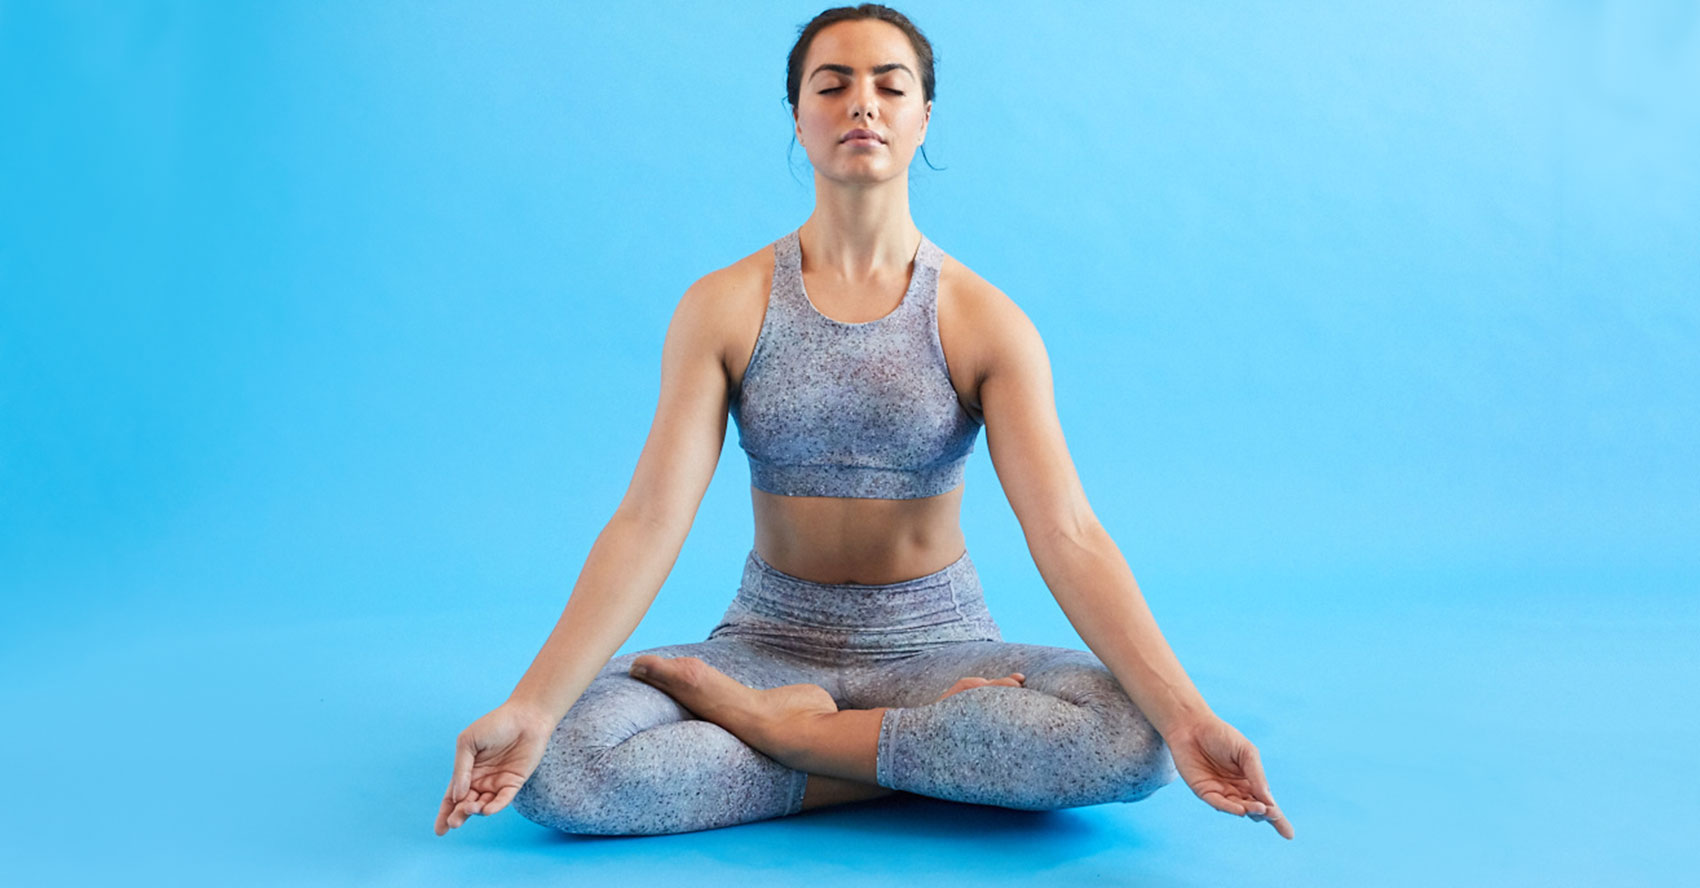
8: Lotus Pose
The Lotus Pose is another relaxing pose. As well as the many mental benefits, this pose is perfect for loosening up your hips and legs. However, this pose takes a lot of practice to do well; beginners should practice this pose slowly, developing their hip flexibility over many months to prepare for this pose. To do this pose, you need to:
- Start in the Staff Pose. Bend your right knee and bring it towards your body. Following this, move your hip so that your right foot can fit between your left leg and left hip.
- Repeat the same movement with your left leg.
- Lower your knees to the floor and rest the tops of your feet on your thighs.
- Keep your spine straight and hold this position for at least a minute.
9: Super Soldier Pose
This pose is equal parts challenging and exciting. The Super Soldier is another inverted pose and gives you a way to stretch out your entire body in one movement. It is also an excellent pose for improving your balance. To do this pose, you need to:
- Start in a folded forward position, with your hands clasping opposite ankles. Push your right leg backward, entering a long lunge.
- Push your left arm beneath your left leg.
- Look into the floor and bring your back leg to your chest. Grab it with your opposite hand.
- Start lifting your leg up, slowly bending your body.
- When your knee is above your head, look towards your standing hand and hold this position for a few breaths.
10: Yoga Sleeping Pose
If you have ever seen a more experienced Yogi turn themselves into a pretzel, this might have been the pose they were performing. The Yoga Sleeping pose is one of the toughest but, when performed right, stretches out your spine and abdomen like nothing else. There are a few steps involved in this pose:
- Begin in the Corpse Pose. As you breathe in, cross one ankle over the other. Move your hand between your legs.
- Put your hands on your ankles before pulling your legs towards your head. Place your feet and ankles behind your head.
- Breathe in and hold for between 15 and 30 seconds.

11: Eight Angle Pose
This pose looks as challenging as it actually is. Your wrists and forearms must be able to hold up the weight of your entire body, all while your legs are held up in a challenging position. If you can master this pose, you will develop incredible arm strength and balance. To do this pose, you need to:
- Start in a sitting position before bringing your left leg above your shoulder.
- Put both of your hands next to your body, a little bit wider than shoulder width. Move your right foot over your left foot by bringing your right leg across your body.
- Roll forward, keeping your hands planted, and rest your chest on the ground.
- Keeping everything close together, lift your body off the ground. Make sure your shoulders bear most of the weight and that your thighs are active to help keep you balanced.
- Hold this position for as long as you can.
This video is a good example of the eight-angle pose.
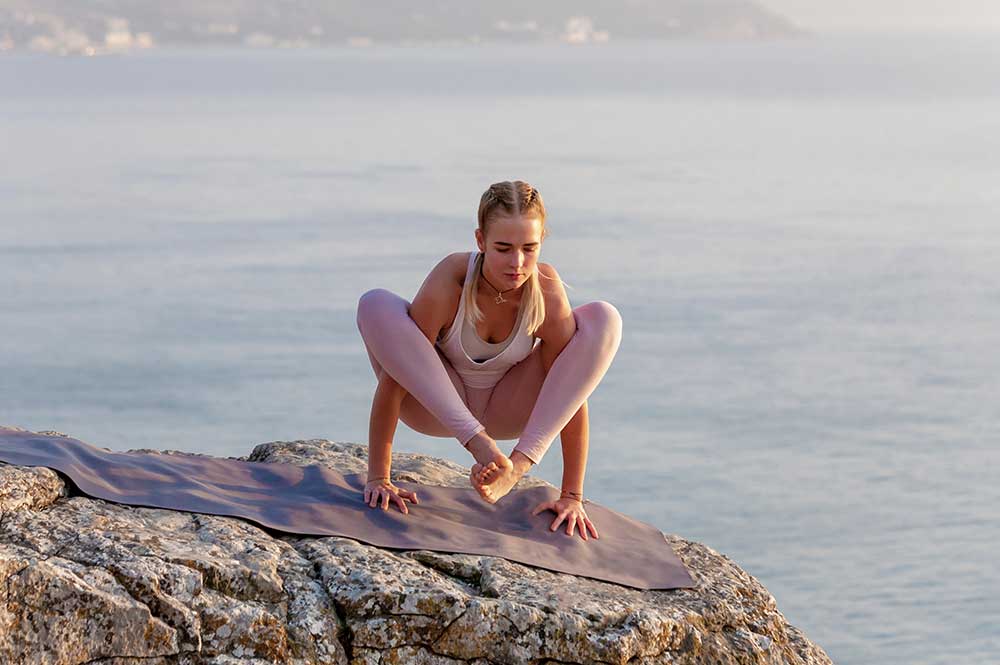
12: Firefly Pose
If you want to improve your arm strength and general balance, then the Firefly Pose is something you should practice. This pose is one of the most challenging, but also one of the most rewarding in terms of flexibility. The steps for this pose are:
- Start with your feet wide, further than shoulder width apart. Bend your knees and body slightly, pushing your body forward.
- Bring your upper thighs up to your shoulders and place your palms on the floor just behind your feet.
- Bend your elbows but make sure your upper arms do not come parallel with the floor.
- Move your weight onto your upper arms and lift yourself off the floor.
- Straighten your arms and legs, holding this position for between three and six breaths.
13: Embryo Pose
If you need a boost of energy and a chance to stretch out your legs and lower body, then you should practice the Embryo pose frequently. This pose puts your leg and hip flexors to the test. There are a few steps in this pose:
- Start in a shoulder stand and cross your legs into the Lotus position.
- Bring your knees towards your head before wrapping your arms around your legs.
- Bring your legs as close to your torso as possible and hold this position for five breaths.
14: Peacock Pose
The Peacock Pose is supposedly one of the oldest non-seated poses recorded. Similar to the Eight Angle pose, this pose is a great way to develop the muscles in your arms. To do this pose, you need to:
- Start in the Hero Pose with your hips open.
- Lean forward and place your hands down. Press your hands into the floor and your torse into your arms.
- Extend your legs behind you, entering a plank style position.
- Shift your weight towards your upper body by squeezing your thighs together and lowering your head.
- Engage your core and lift your feet off the ground, one at a time.
- Hold this pose for between three and five breaths.

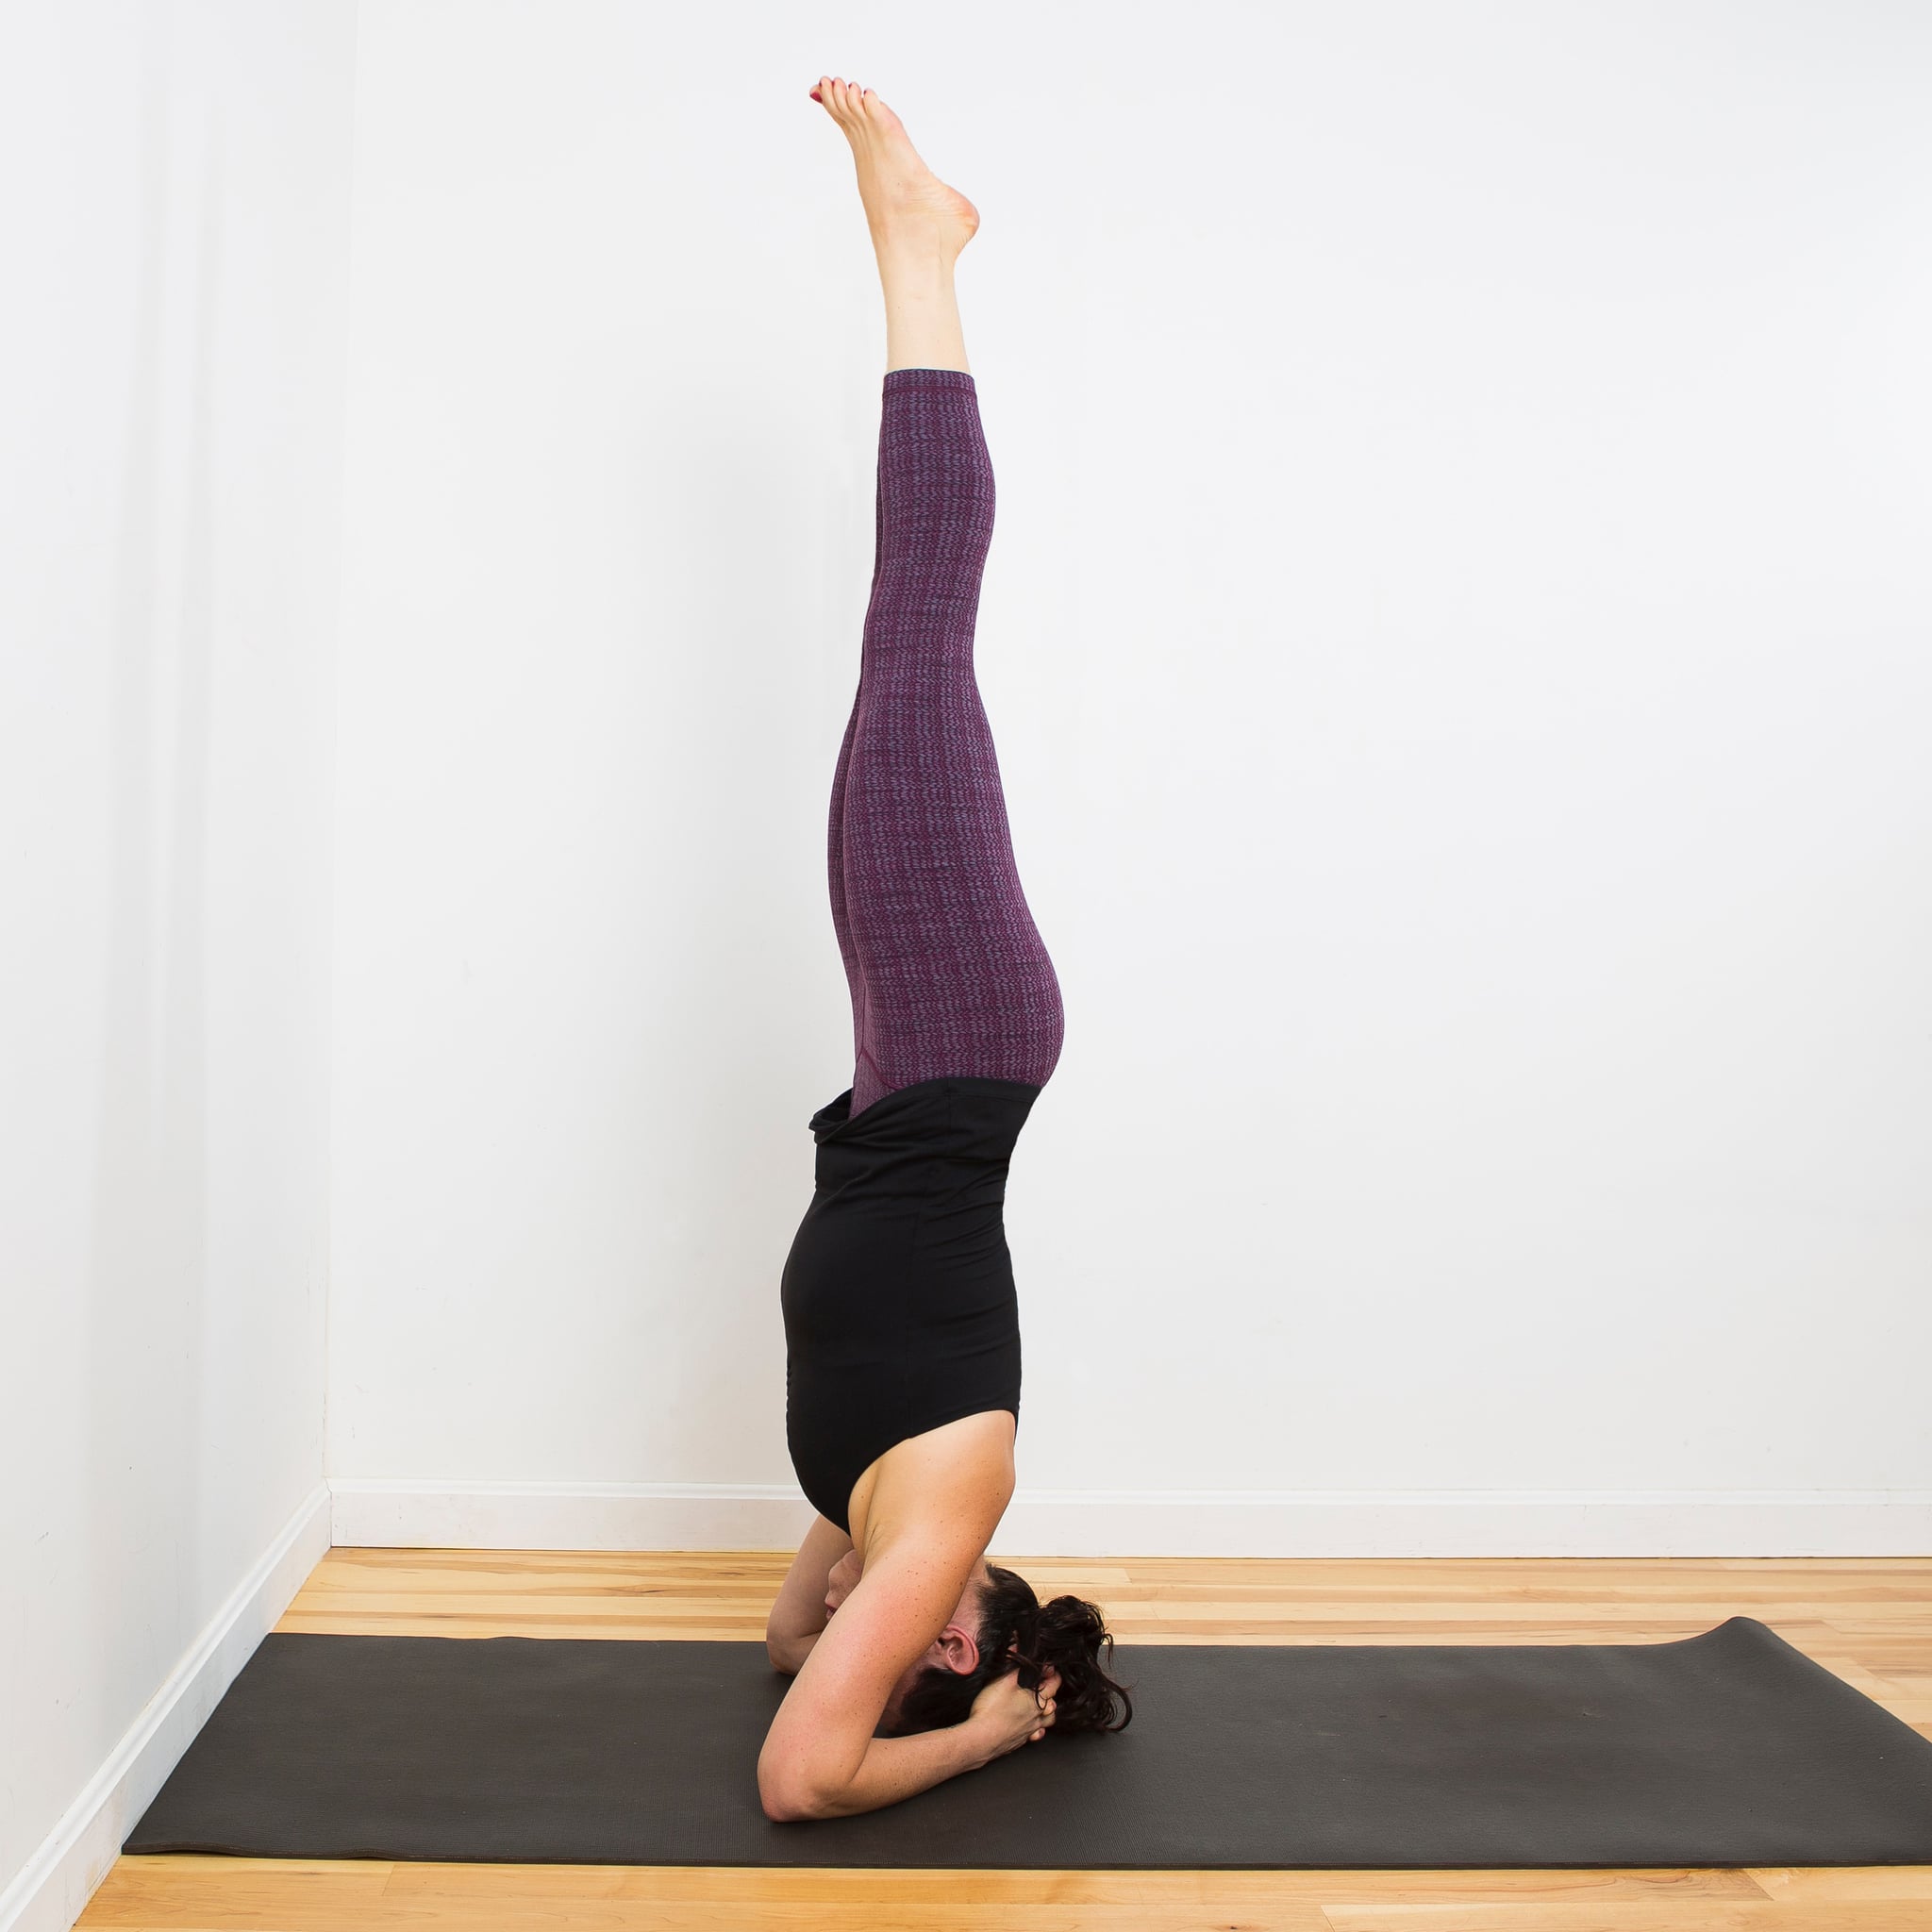
15: Headstand Pose
The Headstand is one of the most iconic poses in Yoga. If you can master this pose, you will notice a dramatic improvement in your posture, as well as better core and back strength. This pose is complex and includes the following steps:
- Enter a kneeling plank position with your forearms on the floor.
- Grab your elbows with your opposite hands. Once you are in position, let go of your elbows and lock your hands together.
- Place the top of your head on the floor, resting the back of your head on your hands.
- Enter Downward Dog and walk your feet towards your body.
- Lift your legs up one at a time. Keep them straight while doing so. While doing this, your shoulders and forearms should bear the weight of your body, not your head.
16: Bow Pose
The Bow Pose is an excellent way to improve your posture. It is also a great pose for alleviating tightness in your back, legs, and shoulders. While not the most complex pose on this list, it is still physically challenging. The pose involves the following steps:
- Lay down on your stomach. Bend your knees and grab your feet with your hands.
- Press your pelvis down and pull your shoulder blades back.
- Once your chest is opened up, hold this position for a few breaths.

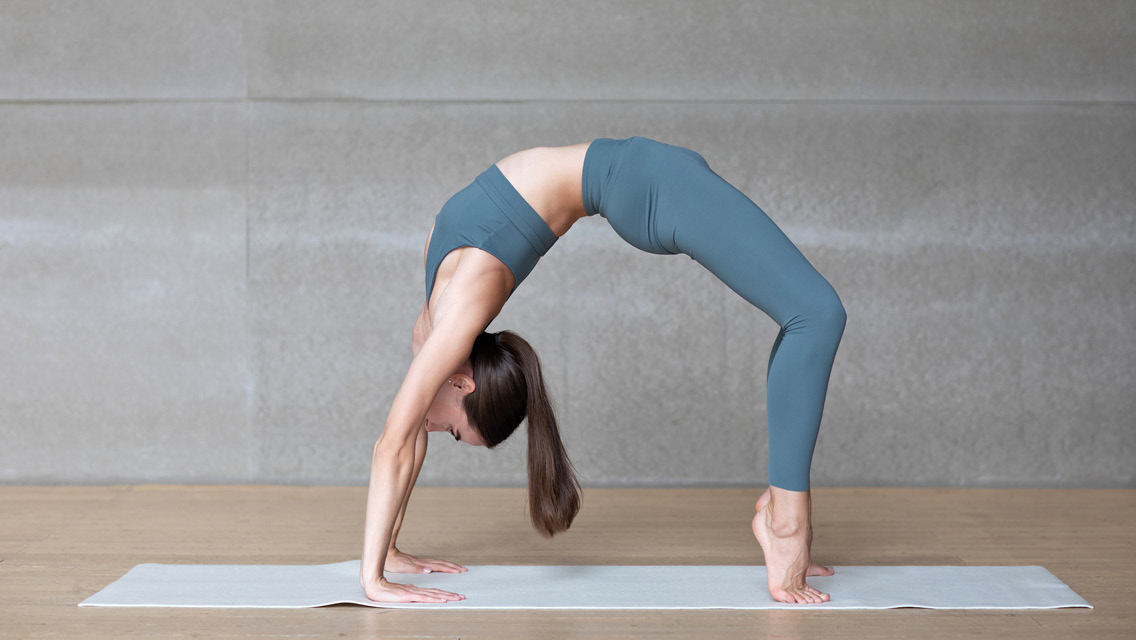
17: Wheel Pose
If you need to improve the flexibility in your spine and quads, then you should try the Wheel Pose. This pose, while tough, is famous for its many benefits, such as stronger arms and legs, as well as improved flexibility. You need to do the following to perform this pose:
- Start on your back with your knees bent. Keep your feet in line with your hips.
- Put your hands next to your ears. Make sure your palms face the floor. Lift yourself up slightly.
- Put your elbows next to your stomach and bring your elbows towards each other. Arch your back.
- Press your hands and feet into your mat and lift yourself up.
- Keep your knees bent but straighten your arms. Keep your weight focused on your big toes.
- Do not try to keep your head up. Push up your stomach and chest.
- Hold this position for as long as you can.
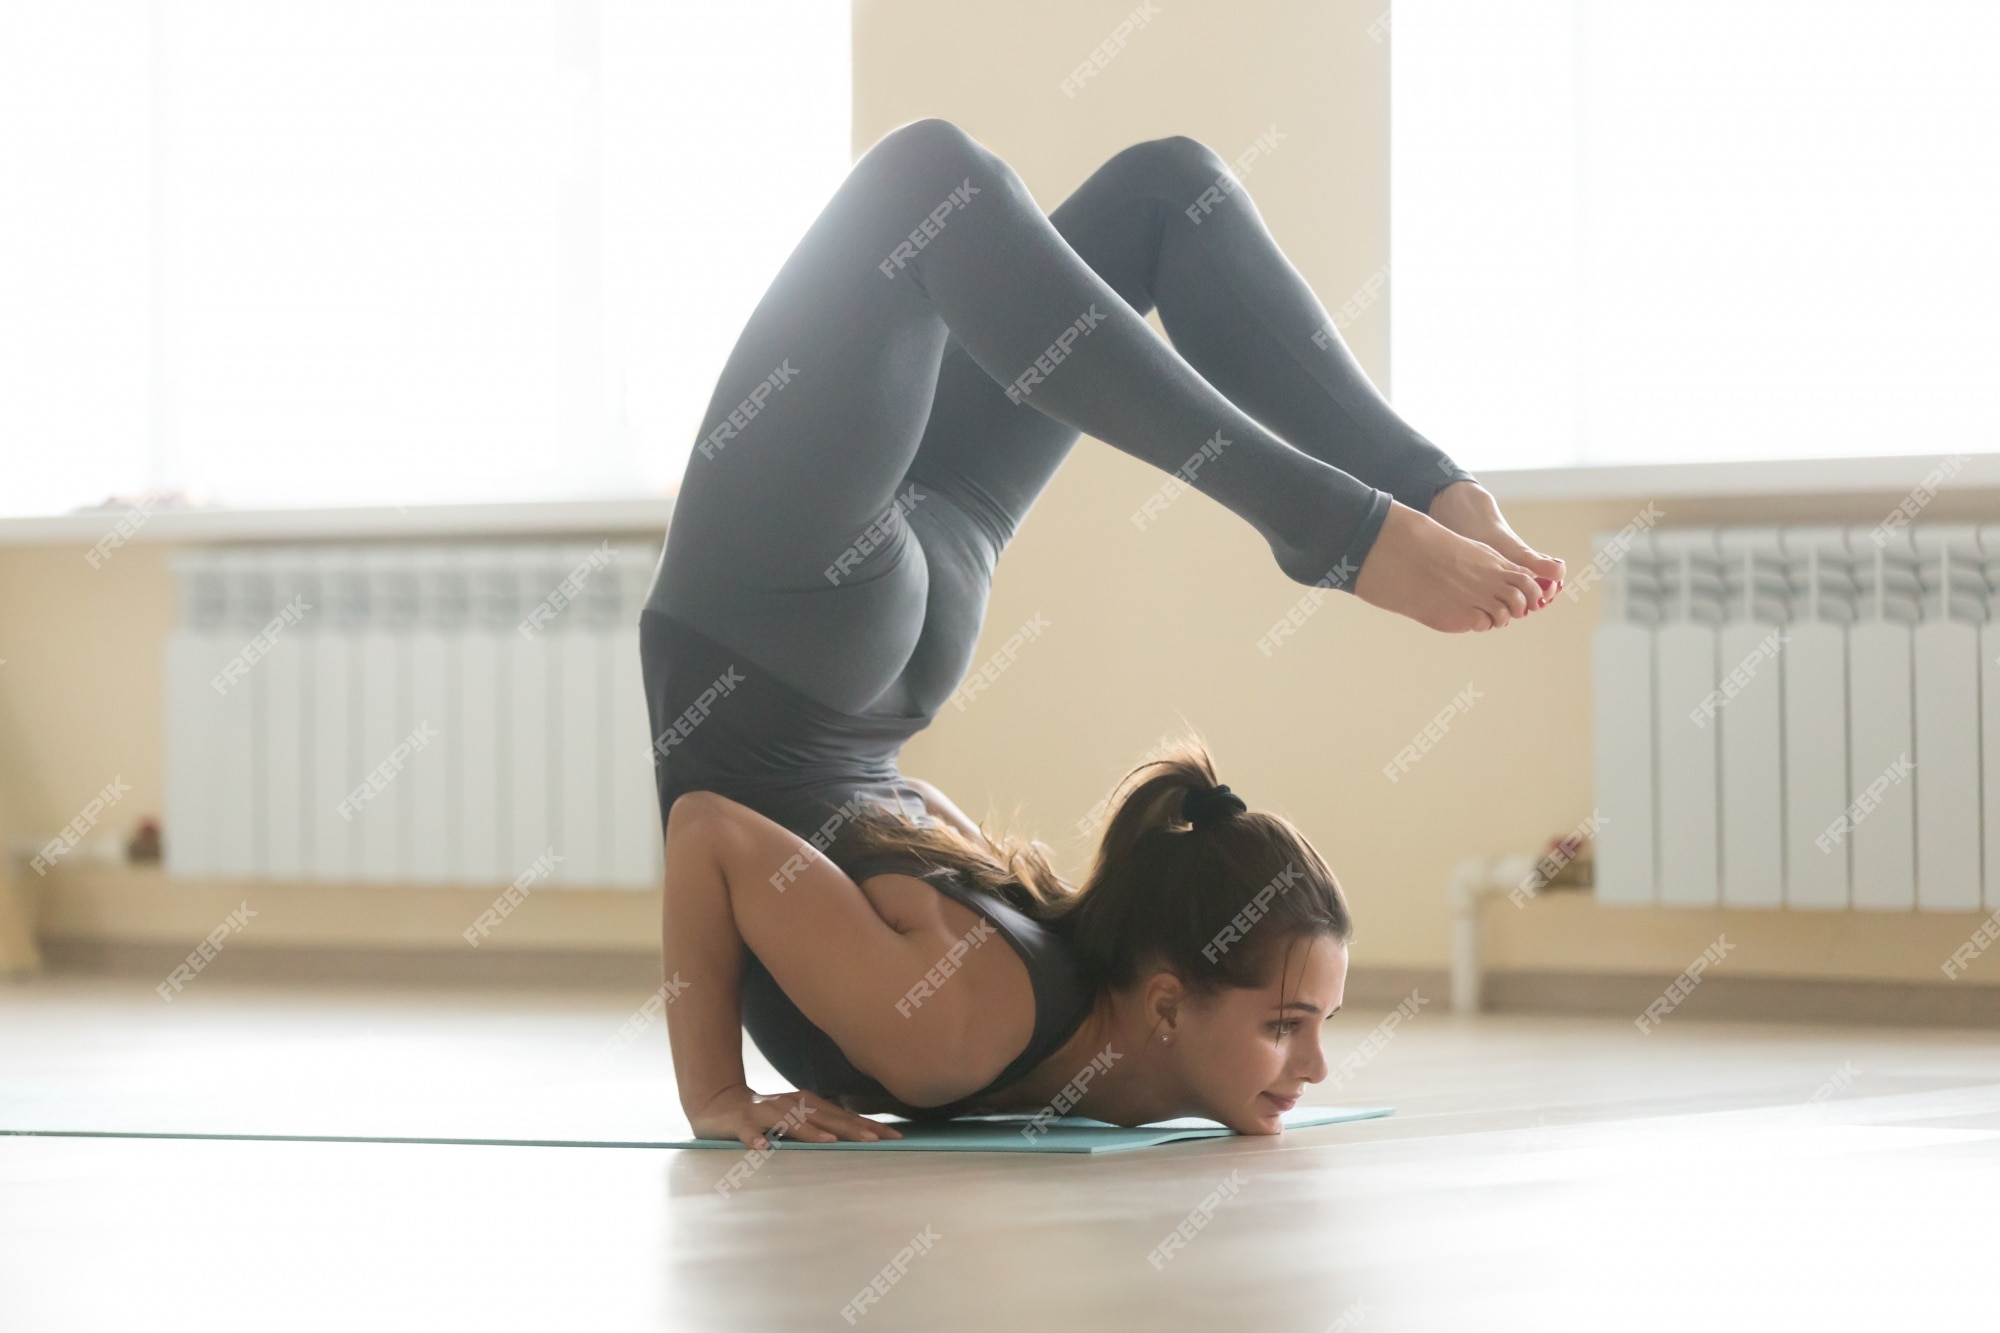
18: Handstand Scorpion Pose
This is a pose that separates the students from the masters. The Handstand Scorpion Pose requires incredible balance. However, practicing this pose gives you the chance to develop your shoulder and back muscles, making it a great way to improve your upper body. There are several steps in this pose:
- Start in a handstand pose. Bend one knee and move one leg slightly forward to retain your balance.
- Lower your chest and raise your head – this will help to bend your back.
- Bend your straight leg towards your head. Bring both legs together, with your knees and toes touching.

19: One-Handed Tree Pose
The Tree Pose is a great way to develop your balance. The One-Handed Tree Pose is a great way to test your balance, as well as develop the muscles in your core and upper body. This pose is one of the most challenging on this list, and it involves the following steps:
- Start with your hands in front of you.
- Straighten your legs as you push them up. Hold this position for 10 seconds.
- Shift your weight to your left hand and shoulder. Take your right foot off the floor.
- Finally, slowly move your weight towards the right side of your body. Take your left hand off the floor and hold your body up with your right hand for at least five seconds.
20: Corpse Pose
This may come as a surprise to some of you, but the corpse pose is one of the toughest poses to do well. This is due to the mental aspect of this pose; not thinking takes years of practice to do, meaning this pose can take a long time to master. There are only a few steps in this pose:
- Make sure your legs and arms are separated. Let your palms face the upwards.
- Let your shoulder blades support your body weight and release all tension in your body. Allow your body to relax and breathe deeply.

21: Feet to Head Pose
The Feet to Head pose is one of the most challenging inversions poses and will push your spinal flexibility to the limit. However, this pose is an amazing way to develop your core and biceps – give it a try when you have some experience doing easier inversions. There are a few steps in this pose:
- Start in a supported headstand, with your forearms bearing most of your weight.
- Bend both of your legs and lower them towards your head.
- Look out ahead of you. This will help you arch your back.
- Hold this pose for between five and ten breaths.

22: The Shoulder Stand Pose
The Shoulder Stand is likely going to be the first inversion you will try in your practice. Even so, this doesn’t mean the pose is easy. It requires an immense amount of concentration and shoulder strength to do safely. Yogis that have not done this pose before should consider using mats or other supports. The steps for the Shoulder Stand pose are:
- Lie on your back and push your shoulders into the floor.
- As you press your elbows into the floor, raise your legs straight up into the air.
- Using the energy generated from moving your legs up, raise your hips over your shoulders. Hold your back up with your hands.
- Hold this position for at least 10 seconds.
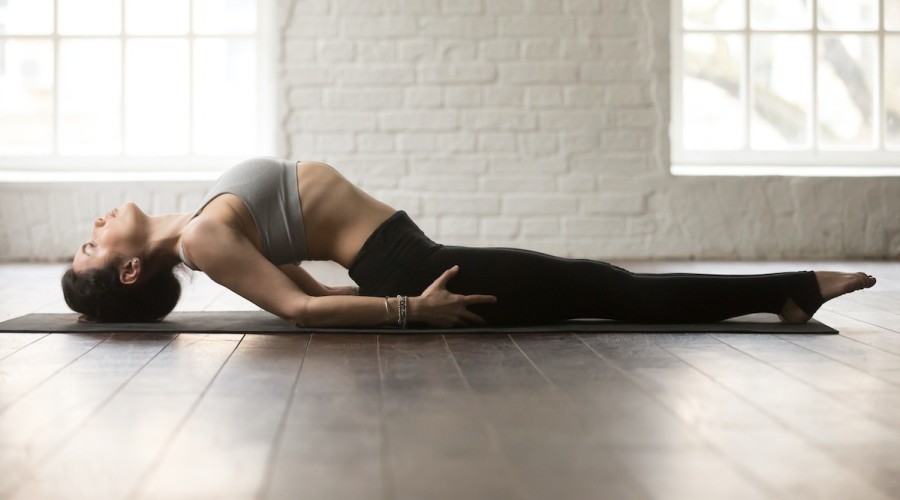
23: The Fish Pose
The Fish pose can be one of the most challenging poses, especially if you have tighter hips and legs. This pose is excellent for expanding your hip flexors, meaning that this pose will get easier the more you do it. The steps for the Fish pose are:
- Lay down on your back and bring your forearms next to your chest.
- Press your forearms into the mat and lift your upper body off the ground. Keep the top of your head on the mat. Your forearms and hips should hold up your weight.
- Keep your lower body on the ground and breath in for between 5 and 10 breaths.
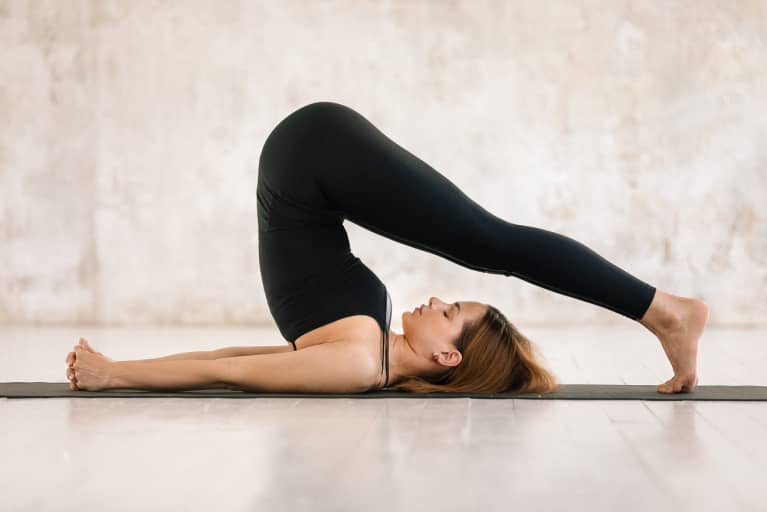
24: Knee to Ear Pose
The Knee to Ear pose is another challenging inversion that requires great flexibility to perform well. If you can do this pose, you will see many benefits, including better posture and more flexible legs. To do the Knee to Ear pose, you need to:
- Start in the Plow pose, with your shoulders beneath your body.
- Bend your knees before bringing them next to your head. Rest your knees next to your head and press your head into your knees.
- End with your knees above your head, your shoulders holding your body weight, and your hands below your head. Breath in for five deep breaths.

25: Semi-Kneeling Praying Mantis Pose
If you want to improve your balance for poses that require lots of twisting, you should try the Semi-Kneeling Praying Mantis pose first. This pose will contort your body in many ways, meaning you need excellent focus and balance to perform this pose well. There are a few steps in this pose:
- Start with your right leg crossed over your left. Keep your right heel attached to the ground while your left leg is flat.
- Straighten your upper body through your spine before shifting your body weight to the right.
- Push your left arm between your right thigh and calf. Press your hands together.
- Hold this position for between five and ten breaths.
26: One-Legged Forearm Wheel Pose
If you have mastered the Wheel Pose, then the One-Legged Forearm variant might be the challenge you are looking for. This pose will stretch every part of your body, from your quads up to your shoulders, while also developing incredible core strength. There are many steps in this complex pose:
- Begin in the traditional Wheel Pose.
- Press your forearms into the mat.
- Raise your leg straight up into the air, tightening your chest to keep balanced.

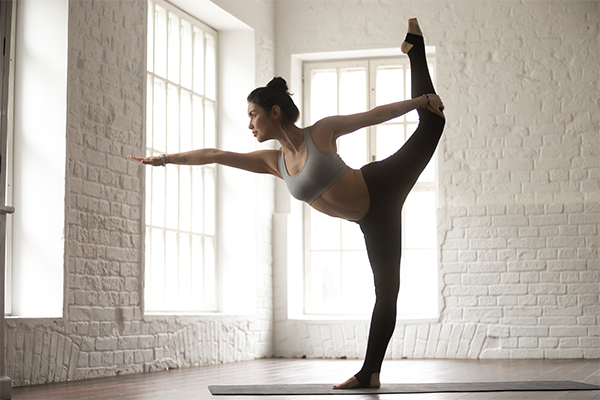
27: Lord of the Dance Pose
If you want to develop leg strength and balance at the same time, then you should try the Lord of the Dance pose. This pose is probably one of the most famous and photo-worthy poses in all of Yoga. If you want to try it, follow these steps:
- Start with your feet close together. Bend one of your knees and bring that foot to your bottom.
- Bend your body forward and draw the bent leg up. Balance yourself out by pointing your other hand outwards.
- Hold this position for at least 15 seconds.
28: Four-Limbed Staff Pose
Similar to a low plank, the Four-Limbed Staff pose is an excellent way to develop the muscles in your core. This pose can also bring a sense of unity to your body as you need to use everything from your feet up to do this pose successfully. There are several steps in the Four-Limbed Staff Pose:
- Start in a high plank position. Align your body; keep your spine, pelvis, and legs in a straight line.
- Breathe out and lower yourself downwards until your upper arms are parallel with the earth.
- Hold this position for at least five breaths.

29: Eagle Pose
The Eagle Pose is one of the best poses for developing your posture, as well as increasing your thigh and leg strength. This pose is as much a mental struggle as a physical one, so make sure you are prepared before performing this pose. There are a few steps in this pose:
- Start in the Mountain Pose before reaching both of your arms out to your side.
- Bend both your knees and wrap your left leg around your right, from thigh to calf.
- When safely balanced, reach both arms out in front of you and wrap your right arm around your left.
- Press your palms together and hold this position for a few deep breaths.
30: Wounded Peacock Pose
If you found the Peacock Pose too easy, then try the Wounded Peacock Pose. This pose forces your forearm and wrist to carry the entire weight of your body while your core keeps everything balanced. This pose is incredibly challenging but also rewarding – this pose greatly improves mental focus as well as core strength. The steps involved in the Wounded Peacock Pose are:
- Start in the Peacock Pose.
- Slowly move your center of gravity to above your left forearm.
- Lift up your right hand and hold this position for five seconds.

31: Tripod Headstand with Lotus Legs
Headstands are tough already. The Tripod Headstand with Lotus Legs adds another layer of complexity; you must twist your legs in an already challenging way, all while inverted. This pose is a marvel when performed well, and is one of the best ways to test your strength and flexibility. There are a few steps in this pose:
- Start off in the Lotus Pose before placing both of your hands in front of you.
- Move into a handstand pose by shifting your weight onto your arms and shoulders.
Here is a video that demonstrates this pose in action.
32: The Superman Pose
While this pose is not the most physically strenuous, the Superman Pose will test your balance and focus like few others. However, this pose will develop your arms greatly if you practice it frequently. There are a few steps required to perform the Superman Pose:
- Start by laying down on your stomach.
- Keep your legs and feet together before stretching both your arms and legs.
- Lift up both your arms and legs, resting all of your weight on your abdominals.
- Hold this position for a number of deep breaths.

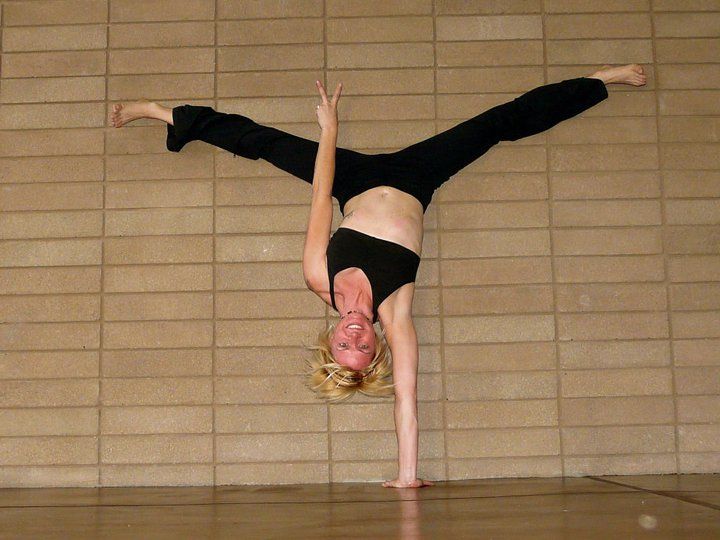
33: Split Leg Handstand
The Split Leg Handstand is a pose for advanced practitioners only as it requires incredible balance, arm, and core strength, as well as mental endurance. If you want to try this pose, make sure you do so on a soft surface and have some experience with inversions. To do this pose, you need to:
- Start in an inverted position, such as downward dog. Activate your abdominal muscles and lift your hips upward while keeping your feet on the ground.
- Rotate your arms and press your hands into the ground.
- Lift one leg up at a time, keeping your legs above your shoulders. Once you are inverted, activate your thighs to help with balance.
- Once you are comfortably balanced, bend one leg forward and one leg backward. Make sure they are straight and hold this position for between five and fifteen seconds.
34: Compass Pose
If you want to twist your body and tone your arms, then you should try the Compass Pose. This pose can be challenging if you have tight hips, so make sure to warm up thoroughly before trying this pose. There are a few steps in the Compass Pose:
- Sit down and cross your legs. Bend your right knee and bring it in towards your chest. Lift this leg towards your left hand.
- Push your right arm beneath your right knee.
- Stay upright and extend your spine.
- You want your right knee to be as high up on your right arm as possible.
- As you bring your left hand to your right foot, begin to extend your right leg until it is as straight as possible. Hold this position for between five and ten breaths.
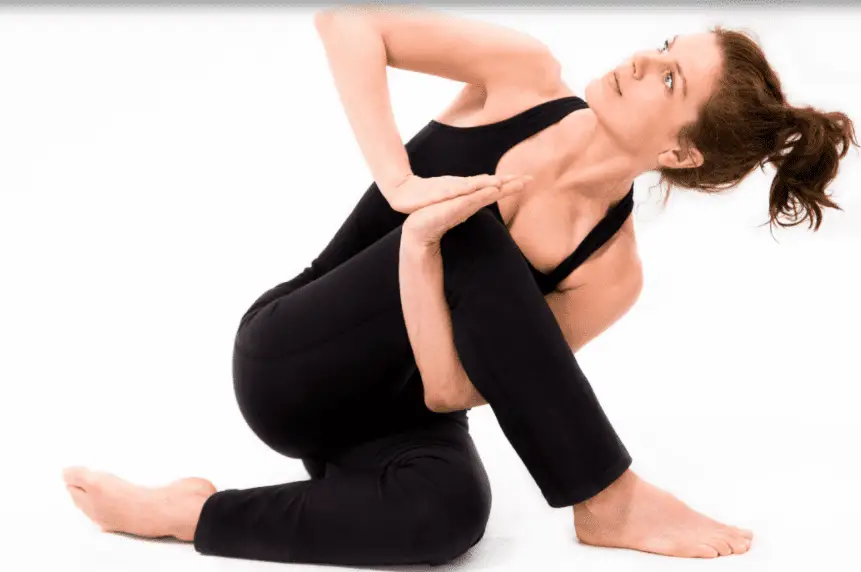
35: Cow Face Pose
While not the most physically demanding pose, the Cow Face pose is one of the most technical Yoga poses you will likely perform. This pose is an excellent warm-up pose as it opens up your chest and stretches your arms. To do this pose, you need to:
- Start in the Staff Pose. Bend your knee and bring your right leg across your left leg, with your knees stacked on top of each other.
- Stretch out your spine. Rotate your right shoulder and bring your right hand behind your back. Rotate your left shoulder and bring your left arm behind your back. Your right hand should be coming downwards while your left should be moving upwards.
- Bring your hands together as they touch and hold this position for a few deep breaths.

36: Wind Relieving Pose
While this pose is easy to try, the Wind Relieving Pose can take years to do properly. Doing this pose well has many benefits though, including improved digestion and better spinal health. To do this pose, you will need to:
- Lay on your back and bring both of your knees towards your chest.
- Hold one of your knees and let the opposite leg return to a flat position.
- Repeat on both sides before drawing both legs towards your chest and then letting them both return to the floor.
37: The Boat Pose
The Boat Pose is deceptively challenging – while not complex, this pose will test your core like nothing else. If you want to do this pose, you will need to develop excellent balance, as well as good ab strength. There are a few steps involved in this pose:
- Sit down with your legs bent and your hands behind your knees. Pull your stomach upwards.
- Roll backwards slightly, resting on your backside. Lift your feet up to knee height.
- Make sure your knees are parallel to the floor as you straighten out your legs.
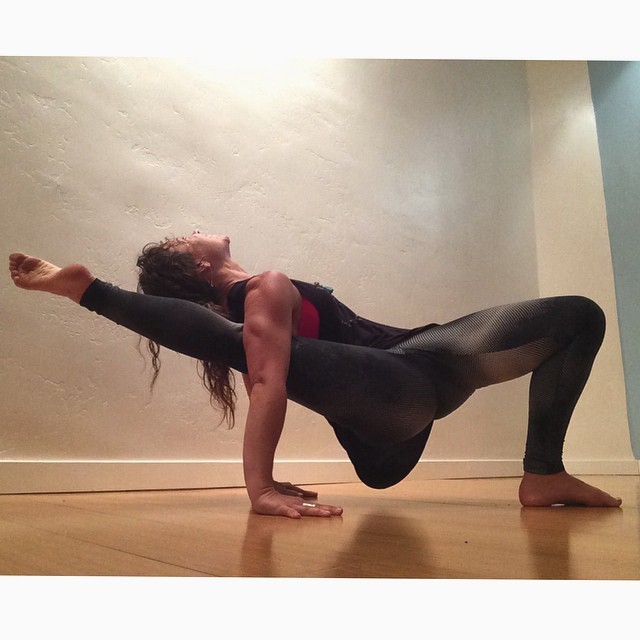
38: Side Reclining Leg Lift Pose
The Side Reclining Leg Lift Pose, also known as the Sleeping Vishnu Pose, is an excellent pose for stretching your legs and hips. While most Yogis can attempt this pose, you will need great flexibility to do this pose fully. There are several steps in the Side Reclining Leg Lift Pose:
- Lay down on your right side and rest your head in your right hand. Make sure your right elbow is in line with the rest of your body.
- Bend your left leg, grabbing your left foot with your left hand. Pull it towards your left shoulder.
- Raise your left arm above your left shoulder and extend out your leg. Hold this position for a few breaths.

39: Fallen Angel Pose
The Fallen Angel Pose is one of the toughest poses in all of Yoga. This pose is an inversion that tests your balance and strength. However, if you can do this pose well, you will be able to develop incredible upper and lower body strength. By doing this pose, many other poses will look easy in comparison. The Fallen Angel pose has the following steps:
- Start in a low squat on the balls of your feet. Make sure your knees are touching.
- Activate your core and bend your body to the right. From here, enter Side Crow; Keep your fingers wide and shift your weight forward. Bend your elbows, rest your thigh on your arm, and raise yourself off the ground.
- Lower your face on to the ground and make sure your arms and shoulders hold most of the weight.
- Lift both of your legs off the ground and point them upwards. Hold yourself in this position for as long as you can.
40: Standing Splits Against a Wall Pose
If you want to test your balance and develop your mental endurance, then the Stading Splits Against a Wall pose is an excellent option. This pose will improve your core, arm, and shoulder strength. There are only a few steps in this pose, which include:
- Start in the Mountain Pose and fold your body forward at the hips. Place your hands next to your feet before shifting most of your weight to your left leg.
- Lift up your right leg until it is parallel to the floor. Once you are in this position, make any necessary adjustments before raising your right leg straight up.
- Hold this position for at least 30 seconds. Repeat the pose on the opposite side.
Conclusion
As you can see, there are many difficult poses in Yoga. Each of the hard yoga poses listed above, while challenging, has many distinct mental and physical benefits. If you want to take your Yoga practice to the next level, then practicing and trying to master these poses might be what you need.
If you know of any other tough Yoga poses that we have missed, please let us know in the comments section below.